Hello again everyone thanks for stopping by for my Tuesday Tutorial!
I am busy preparing for the bad snow storm at the moment
so this is a bit later than I orignally planned Sorry!
Yesterday I shared my Dilek Cute panda bear card
which is what I am going to use as my tutorial card...
For this project I am using Prisma Colored Pencils...
I love this particular brand so much.
All the pencils give you a really good quality color coating &
are fabulous to blend together with a clear blender pencil.
I don't know what other pencils give you as good a quality final image because
I have always used these no need to try others when your happy with what you have. ;)
If you want to shout out what colored pencils you like to use then add a comment and I will add the suggestions to the instructions for future readers! =D
Thanks!
~~~~~~~~~~~~~~~~~~~~~~~
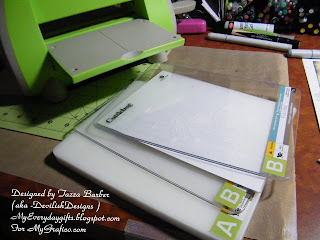
For this project I first used my Cuttlebug dry embosser to emboss my card topper (simple cardstock)
First measure the card & topper to fit the embossing folder you are using.
Make sure the cardstock fits the embossing folder
Next Place the cardstock topper in the embossing folder
Then place your embossing folder in between the Cuttlebug plates
For embossing folders sandwich stack is ( Plate A , Plate B Embossing folder, then Plate B)
If you use thin paper then you may also need to place a shim to make it thicker.
Place the stack in the Cuttle bug then roll it through. Sometimes you have to give it a shove as you go. =D
Next You get to color! Yay!
Now to start off you will need your colored pencils & a clear blender pencil.
(some people use Gamisol or baby oil to blend as well)
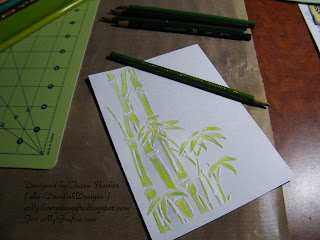
I started out coloring the raised embossed cardstock design
with the lightest color first.
You are just going to color the part that you want to be the lightest part
of the final design.
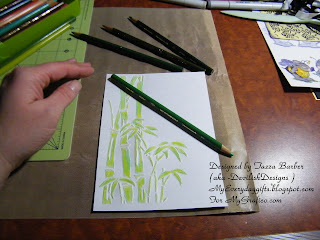
Next move on to the next darker color in the color and pencils you have chosen.
You want to color how you want the dark shading to show.
keep going with the next color in the shading in your color group.
As you can see the bamboo is starting to look very good with highlights & low lights.
I like to play around till I like how the colors look together.
but I always go light to dark you can always go darker but it is hard to go back to lighter.
you can use your lighter pencils to blend the colors together or use the
clear blender pencil ( or gamisol or baby oil)
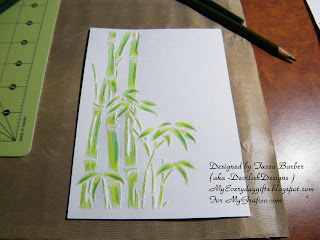
when your done with all the colors just go over a few of your darker spots a bit check that you haven't missed a spot you want colored then...
go back over the whole image with the clear blender pencil to blend and smooth the colors together for
a final time to clean up any missed sections or rough edges...
Then your off to start the next part which is for me the Panda bear...
now I just colored it with Black really dark and no shading but if you wanted to have shading you would use you lighter colores such ans white and greys first...
You can see my final panda here...
After I colored the panda I mounted it to the card with some raised foam tape.
then added some Viva Decor glass effect gel to the leaves to add some interest.
I also stamped the autumn leaves sentiment to the side & layered the card topper on some black cardstock to give it a bit more definition.
Once again the final result.
OK so that is it for this tutorial today!
I hope to cover more coloring tips and techniques soon!
Hope this has inspired you to pull out those coloring pencils and color to your hearts content!
Don't forget to join our new Anything goes Challenge!
A whole month of anything goes ! whoohoo!
Just add your entry link to the linky tool at the top of the page!
Thanks and have a Great Day!














2 comments:
This card is so cute. Love the colors and the panda sitting in the bamboo.
Hi Tazza, This card is adorable! I love the Cuttlebug embossing and coloring you did. Great tutorial!
Post a Comment