My Awesome followers!

Monday, February 14, 2011

Super Sweet Sale at MyGrafico today!

What a Sweet Sale MyGrafico has going on today.
Stop By The Store Today and save big on all those sets you  have wanted to get!

40% Off !!!

MYGRAFICO VALENTINE'S DAY SALE
EVERYTHING 40% OFF.
1 DAY ONLY!! DO NOT MISS THIS GREAT DEAL
FEBRUARY 14TH - Sale ends Midnight.

MYGRAFICO
http://www.mygrafico.com/

Hi Again everyone,
I sure hope things find you well this Beautiful Valentines Day!
I for one Love Valentines Day,
it's sweet to show the one you  love how much you  love them & how much you cherish your relationship... 
I think this goes for friendship, kids and your family as well.

Griffin & I made Valentines Day Cards for his friends and teachers .
We made up some nice treat bags for them all as well.
=D
 This week I got to make some fun cards with the
Cheri Wenger Digital Stamp set

Sweetness Collection
I really loved this set and I made a few cards with it.


Remember to join us in our Monthly challenge!
You can find the link to add your entry in the top of our Challenge Blog... it is easy and what a great chance to have your project seen by everyone! As Always it is Anything Goes!


Thanks for stopping by to check out today's inspiration!

Friday, February 11, 2011

Digi's with Attitude #17

Hello Everyone !
I bring you today the Digi's with Attitude Challenge #17
 If you  can do Anything puffy or poofy on your  projects it Qualifies.
This week we have a nice treat for you all!
We have two sponsors this week
one is as always is DWA for 10.00 in the DWA store.
Also... Stampin' Dragon is our other sponsor and Oh Boy!
They have offered a 10.00 Gift certificate as well!

For my project this week I made a camping card
Once again I used Martha Stewart punches... 3 dot scallop, cornice, and the rose leaf.
I also used prisma color pencils, and  butterfly gems.
No Sentiment on the card but rh the inside reads, You  light my fire and melt my marshmallows, Happy Valentines Day!


Thanks for stopping by today!

Monday, February 7, 2011

Freebie just for you...

Hello everyone!
I have made a little freebie sentiment set for all you Digital stampers!

Just something I made for a few cards I had to make, Hope you  can use them.

Hugs!

Sweet Fairy Purse

Welcome back to Mygrafico's Monday feature!

Just a reminder to enter our ANYTHING GOES MONTHLY CHALLENGE!!
Any Project you have made from the beginning of the month to the end of the month Qualifies!
 We just want to see your work! 
Check out the top of this blog for our challenge entry Linky &  Rules!

 
This week we all got to work with  a lovely set by Mels Brushes called Fairy Glade
This set is Personal use & Commercial use OK & comes is the following formats...
 Vector EPS
Transparent PNGs
High quality JPEGS
Photoshop brush set

I made a treat  purse to stuff some goodies into.
This purse is made from the Tags, Bags, Boxes & more Cartridge.
I used some Metallic Pearl White paper by the paper company.
I used tulle and made a bow then used some metallic rick rack to make the purse handle.
 

I added the digi stamp collage to the purse flap.
 Then I added some more Tulle ( which I Stapled to the purse)
 I also added Rosettes & some String Pearls.
I also used the Hydrangea edge punch by Martha Stuart &
 added some I-Rock Rhinestones to the purse flap.


 On the back side of the Purse  I used a Fiskers Babies Sentiment because it talks about fairies.
I also used some more I-Rock Rhinestones  scattered about.

I just love how this little project turned out. 


OK that is it for today! Look  forward to seeing all your work in the challenge this month!
GOOD LUCK!!

Friday, February 4, 2011

Baking up some love

I don't know about you  but I just love all the cute paper punches from Martha Stewart.
I try to use one on every project  though sometimes it doesn't happen...
This little cutie is the Swirling lace edge (PAP set)  I totally love it. =D
The stamp is a digital stamp from MyGrafico.com 
 The sentiment I used is from the Stampin' Up! set "Hang in there" ( I think that's the name anyway! )
it's a super cute set that has been retired but you  can still find it out there if you look . =D


I colored this with the Prisma Pencils ( yes I know I am on a prisma pencil kick! SORRY COPICS! LOL)
 I just love them they are so smooth and give great coverage and can be blended very easily.

I will be  posting more new cards and projects ...
I have been busy busy busy!
Oh and I have a surprise for all of  my followers on Sunday!
   It's yummy I tell ya! =D
Thanks for stopping by see ya real soon. =D
(((Hugs)))

Digi's with Attitude! #16 Color Challenge!


Hello Everyone! =D
I cannot belive it's FRIDAY already!
Where did the week go??
 Well for me anyway the Blizzard snowed us in. No school or work everyone was home!
 I worked on some projects got caught up on  laundry and did a whole lot of dishes..
One of the things I worked on was this Valentine card for Digi's with Atttitude!  It is a new Digi stamp that hasn't been released yet but today is the big day! Yay!!!  So head on over to the shop and snap this pretty little lady right up for your lovely Valentines day Projects.

So to make my card I started out using some pearlised pink paper I got awhile ago I forget who makes it and I'm just to lazy to go look! =P  Hehehe...
I used my big huge Martha Stewart  punch for the first  layer ( I messed up a bit because I used the wrong measurements, I didn't realise the big ones had a different formula! Dang you  Martha! LOL) It's ok though i  made some flowers and colored some white rosettes pink to cover my boo boo's . =D
 Then I used some net tulle,  Stapled it to the paper then added a strip of pop foam tape to adhear the next layer ( the white paper) for which I used another one of those wonderful punches again ;)

I inked the edges of the white layer then added my Valentine tween ( popped)  on top.
I colored her with Prisma Colored pencils .

Can you  belive I just colored my white roseettes pink with my copic marker!
Looks fabulous and works really well, Gotta Love your copics! =D
now for the Digi's with Attitude! Challenge info... Teeheee...
(I swear I wouldn't forget that! It's important!)

This week is
Challenge #16  
Color Challenge !
Pink &White  (OR) Red &White

As long your project has PINK & WHITE (or) RED & WHITE on it
you're all good !
 =)
See our challenge guidelines here

 Our sponsor this week is:

Winners (one for every 25 entries) will receive


 The Digi's With Attitude! Monthly freebie is HERE
Thanks for stopping by today I hope you  liked my Valentines day card! =D
  (((Hugs)))

Riefka Thank You Sale!

WOW! Lookie at this  huge sale! 40% off  ...  I should go shopping. =D


Riefka 3-Day Thank You Sale!
Feb 4-6
40% off everything
Shop Link: http://www.mygrafico.com/riefka-design/aff_127.html

Thursday, February 3, 2011

LINDSAY STAMP STUFF VALENTINE SWEET SALE!


LINDSAY STAMP STUFF VALENTINE SWEET SALE
EVERYTHING 30 % OFF.
FEBRUARY 3 - FEBRUARY 6TH
SALE ENDS 6TH MIDNIGHT

Shop link: http://www.mygrafico.com/lindsay-39-s-stamp-stuff/aff_100.html


Wednesday, February 2, 2011


Well the Blizzard has left us buried in and I dread going out to shovel!
I took some pictures but I haven't gotten them on the computer yet so look for those later ...
I am busy at the crafting table making some cards & wanted to share one I had made just the other day.
The Artist is  JUST SOME LINES
if you  click on the name you will be taken to the store...
I didn't see these in the store anymore but their are some other cute cupcake stamps.
So be sure to check them out if you  have a chance. =D

I used my copics to color the cupcake then stickles the crap out of it like I normally do, ;)
the sentiment is from TLC Creations.
Click on the name  & it will bring you to the store.
I have bought several  sets from them and love all the different sentiments & styles.

I like how the card ended up,  A nice Clean & Simple card for someone special .
Thanks for stopping by today! I will be sharing lots more cards soon .. I have been busy!
(((Hugs)))


Tuesday, February 1, 2011

Tuesday Tutorial! Embossing & Color Pencil Tutorial.

Hello again everyone thanks for stopping by for my Tuesday Tutorial!
I am busy  preparing for the bad snow storm at the moment
 so this is a bit later than I orignally planned Sorry!
Yesterday I shared my Dilek Cute panda bear  card 

which is what I am going to  use as my tutorial card...
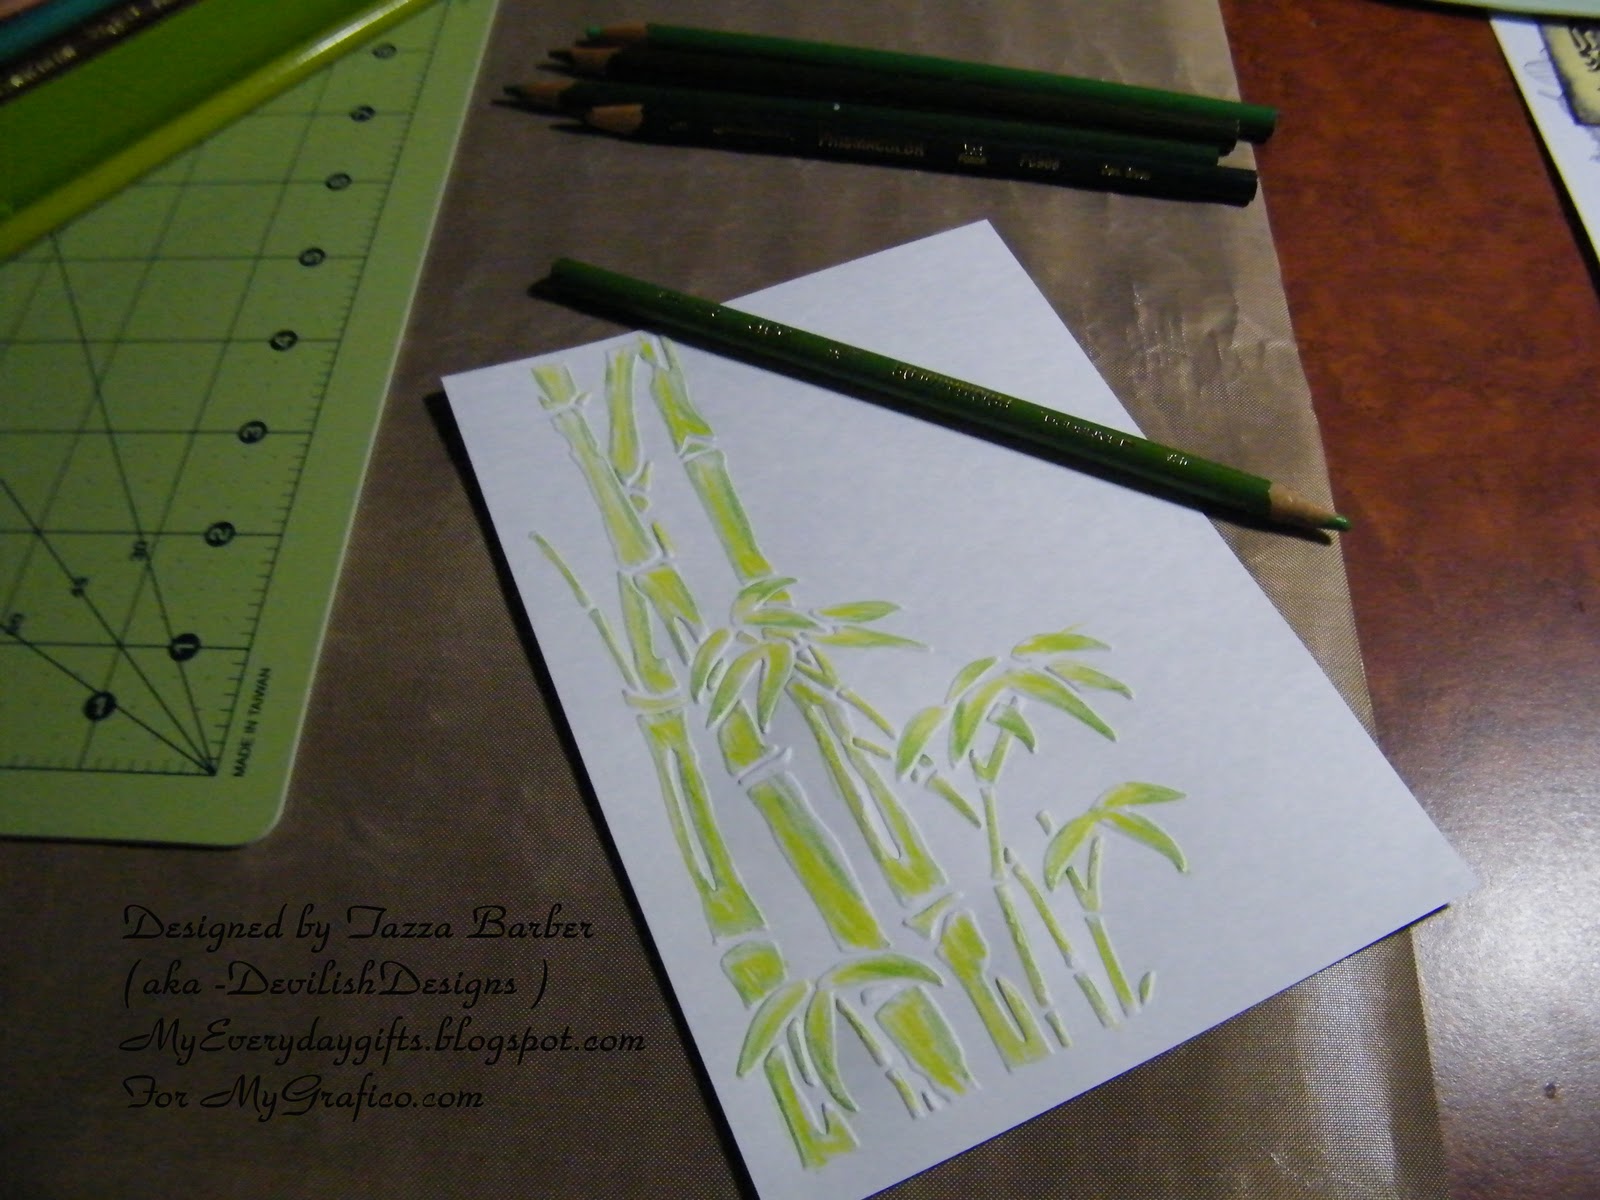
 For this project  I am using Prisma Colored Pencils...
I love this particular brand so much.
All the pencils give you a really good quality color coating &
 are fabulous to blend together with a clear blender pencil.
I don't know what other pencils give you as good a quality final image  because 
I have always used these no need to  try others when your happy with what you have. ;)

 If you want to  shout out what colored pencils you like to use then add a comment and I will add the suggestions to the instructions for future readers! =D
Thanks!
~~~~~~~~~~~~~~~~~~~~~~~

For this project I first used my Cuttlebug dry embosser to emboss my card topper (simple cardstock)
First  measure the card &  topper to fit the embossing folder you are using.
 Make sure the cardstock fits the embossing folder
Next Place the cardstock topper in the embossing folder
Then place your embossing folder in between the Cuttlebug plates
For embossing folders sandwich stack is ( Plate A , Plate B Embossing folder, then Plate B)
If you use thin paper then you  may also need to place a shim to make it thicker.
Place the stack in the Cuttle bug then roll it through. Sometimes you have to give it a shove as you  go. =D
Next You get to color! Yay!
Now  to start off you will need your colored pencils & a clear blender pencil.
(some people use Gamisol or baby oil to blend as well)
I started out coloring the raised embossed cardstock design
with the lightest color first.
You  are just  going to  color the part that you want to be the lightest  part
 of the final design.
Next move on to the next darker color in the color and pencils you have chosen.
You want to color how you want the dark shading to show.
keep going with the next color in the shading in your color group.
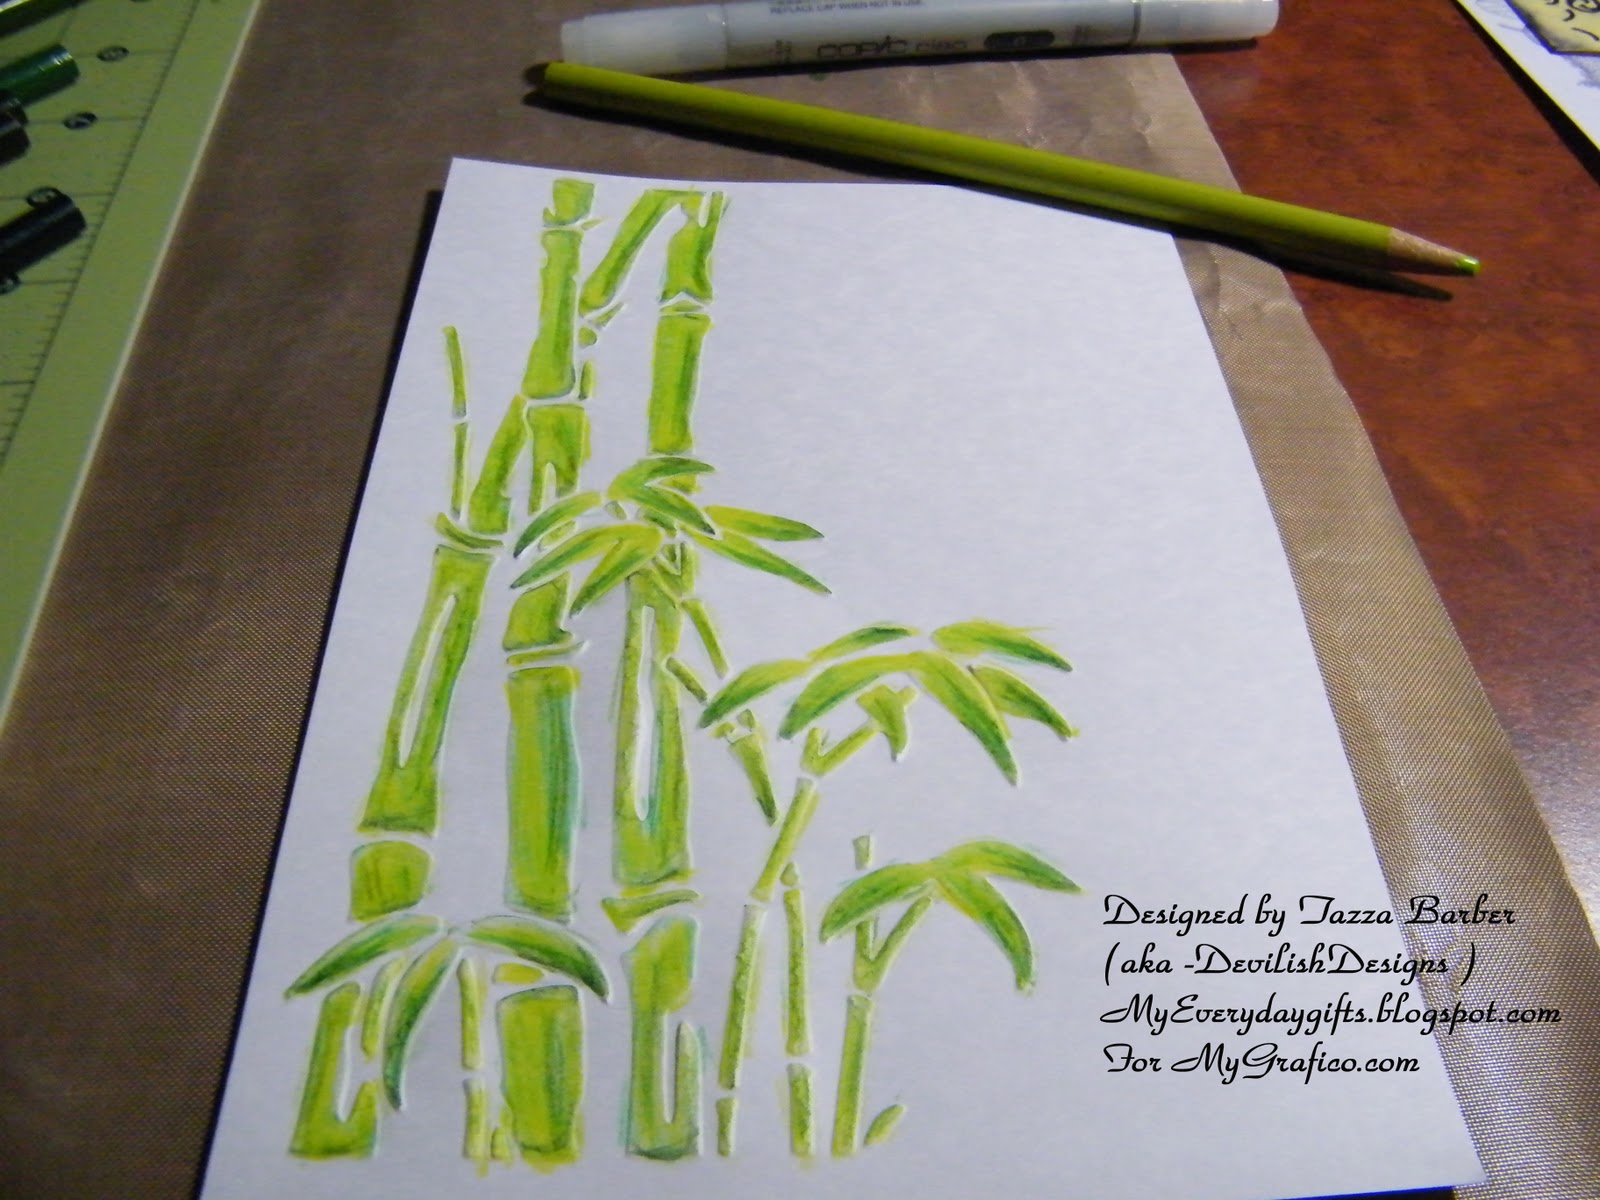
As you can see  the bamboo is starting to look very good with highlights & low lights.
I like to play around till I like how the colors look together.
but I always go light to dark  you can always go darker but it is hard to go back to lighter.
you can  use your lighter pencils to blend the colors together or use the
clear blender pencil ( or gamisol or baby oil)
when your done  with all the colors just go over a few of your darker spots a bit check that you haven't missed a spot you want colored  then...
go back over the whole image with the clear blender pencil  to  blend and smooth the colors together for
a final time to  clean up any  missed sections or rough edges...
Then your off to start the next part which is for me the Panda bear...
now I just colored it with Black really dark and no shading but if you wanted to have shading you  would use you lighter colores such ans white and greys first...
You can see my final panda here...
After I colored the panda I mounted it to the card  with some raised foam tape.
then added some Viva Decor glass effect gel to the leaves to add some interest.
I also stamped the autumn leaves sentiment to the side & layered the card topper on some black cardstock to give it a bit more definition.
Once again the final result.


OK  so that  is it for this tutorial today!
I hope to cover more coloring tips and techniques soon!
Hope this has inspired you to pull out those coloring pencils and  color to your hearts content!
 Don't forget to join our new Anything goes Challenge!
 A whole month of anything goes ! whoohoo!
Just add your entry  link to the linky tool  at the top of the page!
Thanks and have a Great Day!